Here is a new video on how to use xPOS - easy point of sales system
Sunday, May 27, 2012
Using xPOS - easy point of sales system
Using xPOS - easy point of sales system
Here is a new video on how to use xPOS - easy point of sales system
Here is a new video on how to use xPOS - easy point of sales system

Wednesday, May 16, 2012
Turn User Account Control on or off
Turn User Account Control on or off
User Account Control (UAC) can help you prevent
unauthorized changes to your computer. It works by prompting you for
permission when a task requires administrative rights, such as
installing software or changing settings that affect other users.
We don't recommend turning User Account Control off. If you do turn it off, you should turn it back on as soon as possible.
-
Open User Accounts by clicking the Start button
, clicking Control Panel, clicking User Accounts and Family Safety (or clicking User Accounts, if you are connected to a network domain), and then clicking User Accounts.
-
Click Turn User Account Control on or off.
If you are prompted for an administrator password or confirmation, type the password or provide confirmation.
-
Select the Use User Account Control (UAC) to help protect your computer check box to turn on UAC, or clear the check box to turn off UAC, and then click OK.
Tuesday, May 15, 2012
EMS ans xPOS software updates
Here you can download software updates:
Download Update
Critical Update:
* Deletion of accounts with Zero balance and Zero unpaid Invoice (Fixed)
* New interface
Download Update
Critical Update:
* Deletion of accounts with Zero balance and Zero unpaid Invoice (Fixed)
* New interface
Thursday, January 12, 2012
EMS and xPOS Installer Downloads
EMS and xPOS Installer Downloads
Note: for demo license key, contact us or message us on our Facebook page. An XPC Agent will give a DEMO License Key.
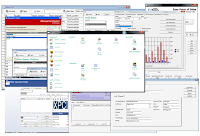
01,12,2012 - Download EMS_installer_package - Extract then run "setup.exe" or read the installation page for more details.
xPOS Installation:
1.) Make sure to run as administrator
Note: for demo license key, contact us or message us on our Facebook page. An XPC Agent will give a DEMO License Key.

01,12,2012 - Download EMS_installer_package - Extract then run "setup.exe" or read the installation page for more details.
xPOS Installation:
1.) Make sure to run as administrator
EMS Installation Guide
EMS and xPOS Installation guide
1. Database Server Installation (You will need to Install the Database Server First) contact Tech support or read the guide on how to install and configure the Database Server.
2. Considering that your Administrator or technical support already installed and configured the Database Server. you can now proceed to the installation and configuration of EMS and xPOS.
If your Seller has given you a CD you can find all files needed on your CD.
or you can download it here:
Download: mysql-connector-odbc-5.1.8-win32
If you just want to try the Fully Functional Demo version
Download Demo Package:
If you have purchased the Full Version of EMS and xPOS then use it to install.
contact us if you want to download the new version or you have lost your copy of the installer, we may need to verify your license on our clients list.
E-mal: config_error@yahoo.com
1. Database Server Installation (You will need to Install the Database Server First) contact Tech support or read the guide on how to install and configure the Database Server.
2. Considering that your Administrator or technical support already installed and configured the Database Server. you can now proceed to the installation and configuration of EMS and xPOS.
If your Seller has given you a CD you can find all files needed on your CD.
or you can download it here:
Download: mysql-connector-odbc-5.1.8-win32
If you just want to try the Fully Functional Demo version
Download Demo Package:
If you have purchased the Full Version of EMS and xPOS then use it to install.
contact us if you want to download the new version or you have lost your copy of the installer, we may need to verify your license on our clients list.
E-mal: config_error@yahoo.com
Sunday, December 18, 2011
Daily Sales Reports
Sales Report Tab (REPORT CENTER)
Hourly Sales Report
Options:
All sales
Filter by Accounts/Department
All Sales with Include Username
All Sales with Filter by Accounts/Department
Daily Sales Report (Cash Sales)
Options:
All Sales
Include User name
Under Payment
Display Unpaid Invoice
Credits Only
Filter by Accounts
Filter By accounts and Under Payment
Filter by accounts and Display Unpaid Invoice
Filter by accounts and Credits only
Monthly Sales Report (Sales for the whole Month)
Filter by Accounts/Department
Hourly Sales Report
Options:
All sales
Filter by Accounts/Department
All Sales with Include Username
All Sales with Filter by Accounts/Department
Daily Sales Report (Cash Sales)
Options:
All Sales
Include User name
Under Payment
Display Unpaid Invoice
Credits Only
Filter by Accounts
Filter By accounts and Under Payment
Filter by accounts and Display Unpaid Invoice
Filter by accounts and Credits only
Monthly Sales Report (Sales for the whole Month)
Filter by Accounts/Department
Thursday, December 8, 2011
EMS Connection Error

How to fix this error:
1.) Make sure you are connected to your Local Area Network (check if Network Card is enabled)
2.) Make sure you can ping your MySQL Data Server
Click your Start Menu and type "CMD" on the Search Files/Run

then type
ping 192.168.0.101 (EMS Data Server)

If everything is OK, you should see a Reply from the Data Server.
In this case we are using a class C IP Address for our Local Area Network and 192.168.0.101 is the IP address of our MySql Data Server.
Note: you can change the Data Server IP address to anything if you know what you are doing. Just make sure all clients are on the same network and have the same subnetmask and can connect with each other.
3.) Open your EMS "config.ini" file located in the EMS installation Folder. Edit the Details in the file such as the Server (IP Address of the EMS Data Server), Username (UID), and Password (PWD). Make sure all details are entered correctly. "Please reffer on MySQL GUI TOOLS on how to add users into MySQL Server"

4.) Go to your Control Panel, Administrative Tools, and click on ODBC

You will also need to set ODBC Data Source. Select the System DSN tab and click configure.

Enter the Details such as the TCP/IP Server( in this case enter the IP 192.168.0.101 if you are using 192.168.0.101 as your MySQL Data Server IP) also enter the Username and Password.
Remember: Administrator should add the Username and Password for each client on the MySQL Server. This is needed in order for EMS to connect.
Click on Test button to test the connection.
5.) If the Connection Error is still Not Resolved, check your Firewall settings. You can disable your firewall or you can just open the following ports.
Port 3306 and grant full access to EMS.This goes same way with your MySQL Data Server. You should also allow the MySQL from your Firewall.
Subscribe to:
Posts (Atom)